How to Upload Image Set to Instagram
With over 1 billion active users, Instagram is one of the best social media networks to advertise your business, reach new audiences, and grow brand sensation. Then even if you aren't active on the website yet, it'south never too late to prefer an Instagram strategy in your marketing plan. If you're gear up to outset sharing content through this channel, we've got you covered. Here, we've cultivated a quick-and-easy guide to posting on Instagram, to ensure you can begin attracting the attention of your audience with Instagram marketing. Posting to Instagram consistently tin help businesses discover resonance with their audience and grow better, but doing it right is just every bit important. Here'due south how to post to your Instagram account stride-by-footstep. See that plus sign [+] in the epitome in a higher place? That'south your starting signal. See that postal service from our culture account? That'south your endpoint. Click that plus sign and you'll be ready for the next step, below. Instagram volition show you the photos already saved to your phone. Choose one of those to post. Alternatively, you tin click on the camera icon to take a photo or video within the Instagram app itself, if you lot don't already have an image you want to use. Once you lot select and crop an image (or carousel of multiple images), click the pointer push in the elevation right corner of the app. Do you have multiple photos and want to highlight them all? Instagram allows you to do this with its carousel feature. As you lot go to tap a photo or video, outset tap the icon just above your photos to the correct that looks similar stacked squares. Once you tap this, you'll come across a number on the corner of every paradigm or video y'all tap. This number notes where the content will evidence up in the carousel. You lot aren't express to but a square image on Instagram. You can actually share horizontal or vertical images too. To get more of your image seen, pinch the screen of the photo y'all've selected on the Library screen. However, while Instagram does allow vertical and horizontal options, the images still demand to fit into some specific dimensions. Then, you might still demand to crop a tiny flake of your photo to get it to fit. Instagram offers 24 filters — scroll to the right to peruse your options, and click on one to preview how information technology will await on your photo. By default, the filter will be applied by full strength. Yet, if y'all want to calibration back the intensity of the filter, double click the filter tile once information technology's been practical, and a scale selector will appear, allowing you lot to downplay the event. You can too tap the magic wand at the top of the screen to adjust the photo further. (Take a await at our Ultimate Guide to Instagram Filters to larn more). You can likewise click "Edit" at the lesser right to adapt the image to your specifications. Hither are the editing options that come built into Instagram for you: Become creative and write a nice, interesting caption to go with your photograph. Since text can help optimize your mail service in Instagram's search, writing something can just benefit you. With Instagram's search characteristic, users can search by hashtags. So, you should brand sure to write relevant hashtags in your caption. If someone does a search of a hashtag you lot placed in your explanation, they might find your mail service also equally others that included the same 1. Desire your friend or their followers to encounter a photo that y'all posted of the ii of you? Tag them! On the new postal service folio, y'all tin can click "Tag People" to tag other Instagram accounts in your post. Alternatively, y'all tin include their handle (or their username beginning with an @ symbol) in your explanation. If yous're on a fun holiday or at a nifty event and you don't feel like including that information in your caption, you can mark where you are in another style. On the new post page, tap "Add Location" to put a location on your epitome (which makes it easier for people to find your post). When you mail an image or video with a location, it will evidence up between your name and the block of content on the feed. Emojis are fun and can make your explanation more than middle-catching. If you know of a few relevant emojis that could fit with your mail, stick them in the explanation expanse. For case, if you're posting a vacation photo, yous could include a palm tree 🌴 or a plane ✈️ to evidence you flew somewhere. Here are the top Instagram emojis y'all tin use: However, keep in mind that at that place's a multitude of choices to add flair to your posts, from keeping it real 💯 to the cringe face 😬. Be sure not to get overboard and mail emojis but for the sake of posting them. If you mail a bowling emoji along with a photo of a beach, that apparently won't make sense to people. Similarly, if you post twenty emojis that loosely relate to a post, you lot might merely badger your followers or come off as drastic. Finally, if you want to share your content on your other, connected social media sites (like Facebook or Twitter), but slide the bar from the left to the right. When you're gear up to post, click "Share" in the superlative right. If yous're non ready to post right abroad, you can too salvage information technology to your Instagram Saved Drafts. But go back to the filtering and editing pace, tap the back arrow in the top left, and select "Save Typhoon." Typos happen to everyone! If you only posted something and notice a glaring spelling error, don't panic. Simply tap the three dots that announced on the right across from your proper name, then tap "Edit." Make the adjustments y'all come across fit and save them and then it reflects on your Instagram. Otherwise, your mail service is complete and alive for everyone to see. Now that you know how to post to Instagram, you can begin creating content for the platform and connecting with your audition. If you're a business or brand, you'll want a solid strategy for earning engagement and awareness. Editor'south note: This post was originally published in November 2019 and has been updated for comprehensiveness. 
How to Post on Instagram
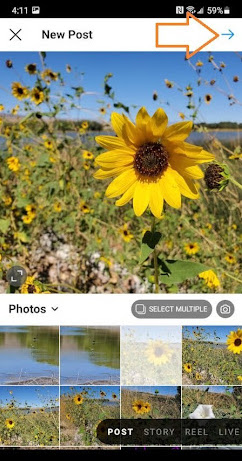
Step 1. Tap the + icon at the summit of your screen.

Step 2. Cull a photograph or video from your library or shoot one in the app.
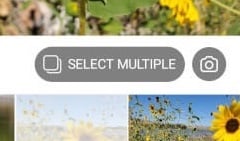
Pace 3. Post multiple images on Instagram.
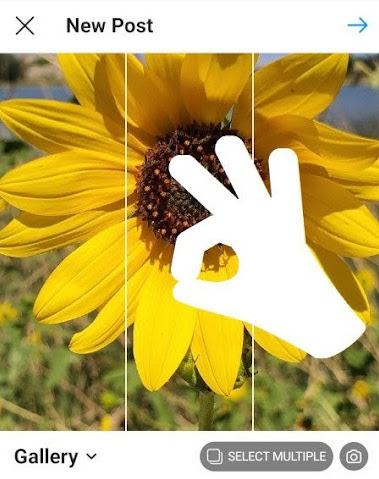
Step 4. Crop the image.
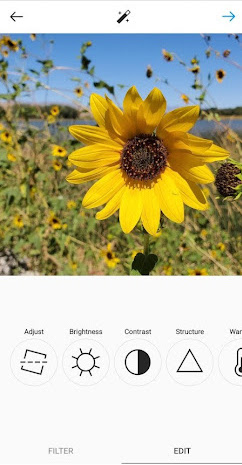
Step 5. Option a filter.

Step 6. Edit your photo.
Step seven. Blazon your explanation.

Footstep viii. Use hashtags for postal service optimization.
Footstep 9. Tag friends.
Pace 10. Add your location.
Step eleven. Play with emojis.
Step 12. Share the post on other social media platforms.

Instagram Saved Drafts
Pace xiii. Edit the post.

Abound Your Audience on Instagram Today
Originally published Dec 30, 2021 7:00:00 AM, updated December thirty 2021
pattersongived1963.blogspot.com
Source: https://blog.hubspot.com/marketing/how-to-post-on-instagram
Post a Comment for "How to Upload Image Set to Instagram"